Nexus has launched their final testnet before the mainnet release, offering rewards for running a node.
These rewards will be based on the points accumulated during the Nexus Incentivized Testnet. Points will be converted into test tokens, which will later translate into mainnet tokens.
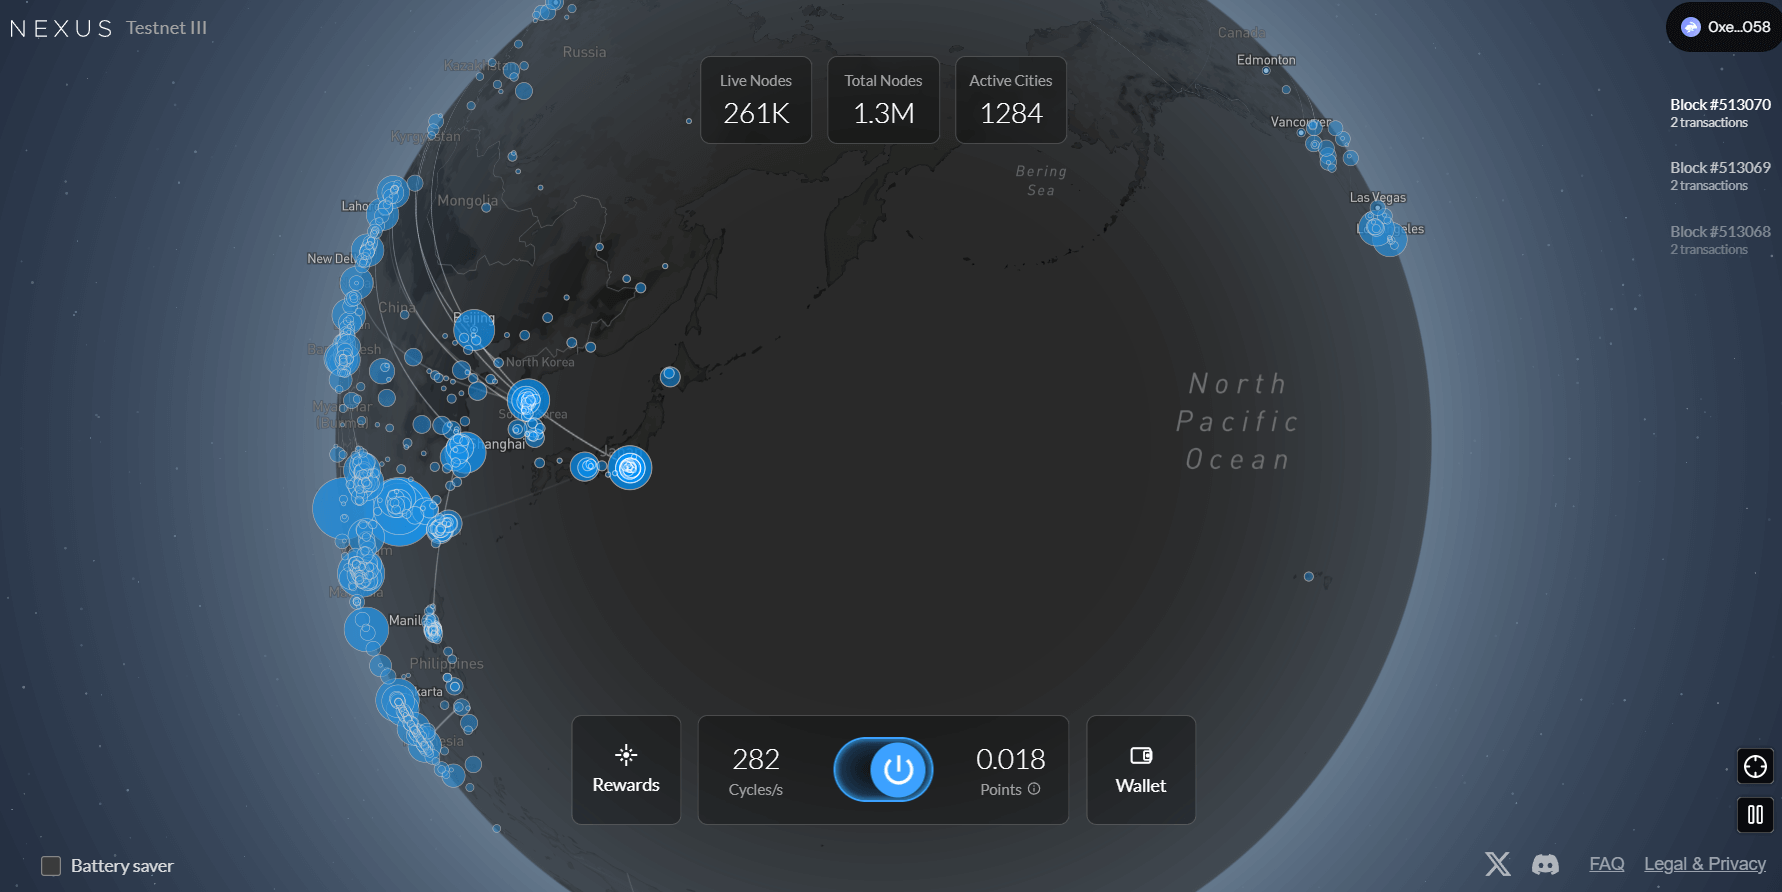
What is Nexus Network?
Nexus Network is a hyper-parallel proof-mining system powered by a high-speed, zk-optimized virtual machine — built for both scalability and security.
The project has already secured $27 million in funding from top-tier investors like Pantera Capital, Dragonfly Ventures, and several other VCs.
Let’s Get Started
If you’re already familiar with Nexus from participating in Testnet 1 or 2, the process remains the same.
But if you didn’t take part in the previous seasons, don’t worry — here’s a step-by-step guide for both new and returning participants.
Even if you’re starting now, it’s not too late.
👉 Start here…
Contents of the Page
Nexus Incentivized Testnet – Browser-Based Node
- Go to the official Nexus dashboard: https://app.nexus.xyz/
- Connect your EVM-compatible wallet (MetaMask, Rabby, etc.) and your email (if you haven’t added it already).
- Click on the Start icon to launch your browser-based node.
Note: While the browser node works, it earns fewer points compared to the CLI method.
Nexus CLI Node (More Points) – Paid & Free Setup
To maximize your points, it’s highly recommended to run the node using the CLI (Command Line Interface) version. This method gives significantly more rewards.
- First, we’ll show how to run the paid(VPS cost only) CLI version.
- Then, we’ll guide you through setting it up for free on your local PC.
Running the node via CLI will help you earn much more in the Nexus Incentivized Testnet.
Nexus Incentivized Testnet – CLI Node Setup on a VPS
VPS Setup:
If you are running any other node, you can run this Nexus Node on the same VPS.
Node Hardware Requirements(minimum):
- CPU: 2 Core
- RAM: 4 GB (8 GB+ recommended).
- Storage: 10 GB minimum.
- Bandwidth: Stable Internet Connection
- Operating Systems: Linux
Alternatively, I recommend using this VPS starting at $4.95 — or for better performance, consider higher-tier plans like 6 vCPU / 12 GB RAM for $7.95 or 8 vCPU / 24 GB RAM for $15.
Termius Application Setup
- Open the Termius application on your PC or phone. You can download the app from the Microsoft Store or Google Play Store for free. Create a free account using your email.
- Input the following details:
- Host: Your VPS IP
- Label: Nexus
- Username: root
- Password: Your VPS Password
Save and connect to the VPS.
Note: If you are new to Termius, on a PC, to copy, press Ctrl + Shift + C, and to paste, press Ctrl + Shift + V.
Prepare Your Environment
Step 1. Update Your System
sudo apt-get update && sudo apt-get upgrade -y
Step 2. Install Required Utilities
sudo apt install build-essential pkg-config libssl-dev git-all protobuf-compiler -yStep 3. Install Rust (if not already installed)
curl --proto '=https' --tlsv1.2 -sSf https://sh.rustup.rs | shAfter installation, run:
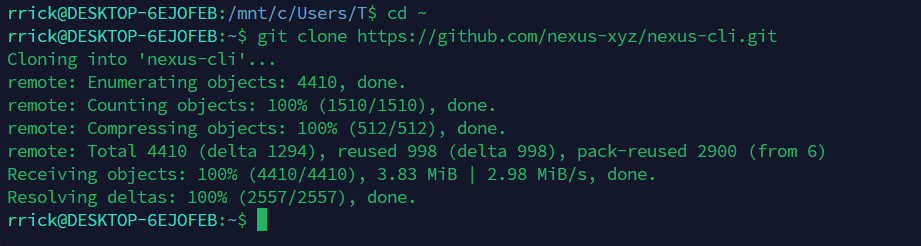
source "$HOME/.cargo/env"Step 4. Navigate to Home Directory
cd ~This takes you to your native Linux home directory, e.g., /home/your-username.
Step 5. Clone the Nexus CLI Repository
git clone https://github.com/nexus-xyz/nexus-cli.gitcd nexus-cli/clients/cliStep 6. Build the CLI
cargo build --releaseThis compiles the Nexus CLI and generates the binary at:
target/release/nexus-networkStep 7: Run the Node
- Go to your Nexus Dashboard
- Click on the 4th icon (Node) from the left sidebar.
- Select “Add CLI Node”
- Copy the Node ID
Now, run the following command in your terminal (replace <node-id> with your actual Node ID):
./target/release/nexus-network start --node-id <node id>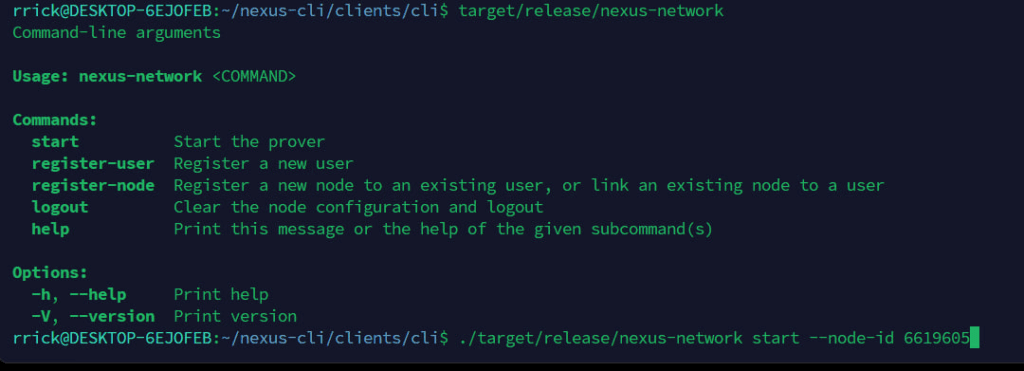
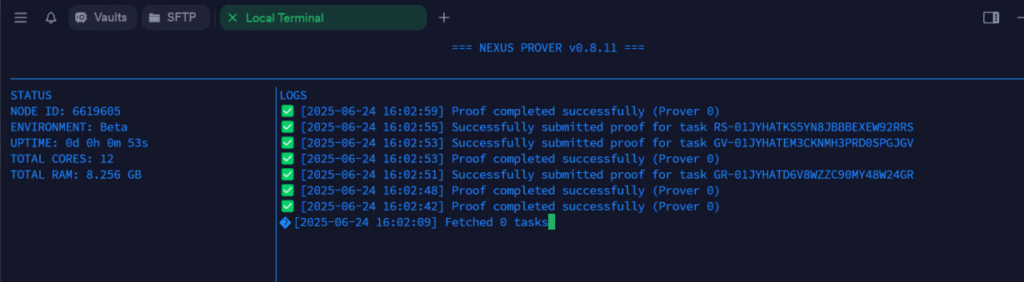
Confirm It’s Working
- Go back to the browser dashboard.
- Click Done and refresh the page.
- You should now see your CLI node added and actively accumulating points.
Keep It Running in Background
Detach the session: Press Ctrl + A + D
To reattach later:
screen -r nexusFree WSL Method: Run Nexus CLI Node on Your Local PC
Set up the Nexus CLI node for free using WSL (Windows Subsystem for Linux) and the Termius terminal app.
Step 1: Install Termius (Optional but Useful)
Download and install Termius from the Microsoft Store.
- Create a free account using your email.
- Open Termius and click on “Local Terminal” or press
CTRL + L.
Step 2: Install WSL (Ubuntu 24.04)
In the local terminal, run the following command:
wsl --install -d Ubuntu-24.04- If prompted, restart your PC, then run the same command again.
- After installation, WSL will ask you to create a username and password — do that and press Enter.

Step 3: Update Your System
sudo apt-get updateStep 4: Install Required Utilities
sudo apt install build-essential pkg-config libssl-dev git-all protobuf-compiler -yStep 5: Install Rust (if not already installed)
curl --proto '=https' --tlsv1.2 -sSf https://sh.rustup.rs | shThen restart the shell or run:
source "$HOME/.cargo/env"Step 6: Navigate to Home Directory
cd ~This takes you to your native Linux home directory, e.g., /home/your-username.
Step 7: Clone the Nexus CLI Repository
git clone https://github.com/nexus-xyz/nexus-cli.gitcd nexus-cli/clients/cliStep 8. Build the CLI
cargo build --releaseThis will compile the Nexus CLI binary. After it completes, you’ll find it here:
target/release/nexus-networkStep 9: Run the Node
- Go to your Nexus Dashboard
- Click on the 4th icon (Node) from the left sidebar.
- Select “Add CLI Node”
- Copy the Node ID
Now, run the following command in your terminal (replace <node-id> with your actual Node ID):
./target/release/nexus-network start --node-id <node id>Confirm It’s Working
- Go back to the browser dashboard.
- Click Done and refresh the page.
- You should now see your CLI node added and actively accumulating points.
Keep the terminal open until you shout down your pc.
Step 10: Restart Node After Reboot
If you shut down your PC, here’s how to restart the node:
- Open Termius
- Press
CTRL + Lto open the local terminal - Start WSL:
wsl -d Ubuntu-24.04 Navigate to your Nexus CLI directory:
cd && cd nexus-cli/clients/cliStart the node again (replace <node-id>):
./target/release/nexus-network start --node-id <node-id>Disclaimer: Some of the links in this post are affiliate links. If you choose to make a purchase through them, I may earn a small commission at no extra cost to you. This helps support the blog and keeps the content free. I only recommend services I personally use or trust.
- Join LiveArt Airdrop and start earning $ART Points
FAQs:
When does Testnet III end?
Testnet III will continue until the Nexus Mainnet launch, expected later in Q3.
Does it make sense to run multiple browser nodes on the same device?
No — running multiple browser nodes on the same device doesn’t provide any extra benefit. You can’t reuse the same computing power multiple times.
Can I run more than one CLI node on a single device?
Not effectively. Running multiple nodes on the same machine just recycles the same resources — it’s like trying to eat the same meal twice.